How to Winterize a Travel Trailer - 7 Easy Steps
If you are storing your camper somewhere cold this winter, you will need to winterize a few components of your RV.
Properly winterizing your camper is essential to keep your plumbing, electrical, and propane safe through the cold winter months.
Even if you’re a beginner, you can absolutely winterize a camper yourself as RV manufacturers have made this process quick and easy, especially on newer rigs.
I will walk you through these 7 simple steps to winterize your camper whether it’s a travel trailer or a drivable RV.
Winterize a Camper for Beginners:
Clean and inspect interior and exterior
Disconnect batteries, propane, and solar panels
Drain and clean waste water tanks
Drain the fresh water tank and water lines
Drain the water heater
Prevent pipes from freezing (blow out water lines or pump in antifreeze)
Store your RV properly
Every RV is a little bit different, but the overall process is the same. Make sure you review your owner’s manual before you start and keep it handy for any unique aspects of your rig.
Keep in mind that fully winterizing your camper will means your plumbing system is out of operation for the season.
If you are looking for tips on how to remain living in your RV during the winter months, check out this post on staying warm while Living in an RV in Winter.
We use affiliate links for products we recommend and, at no extra cost to you, it helps us earn money to support our blog!
Supplies Needed:
- Rags
- Cleaning solution (Chlorox, Windex, etc)
- Stinky Slinky
- Wrench that works with 1” bolt
- (optional) 5 Gallon Bucket to catch water from water linesOption #1 for Plumbing
- Air Compressor
- Adaptor for Air Compressor
- 1 Gallon of RV AntifreezeOption #2 for Plumbing
- RV Antifreeze Hand Pump Kit
- 4 Gallons of RV Antifreeze
How to Winterize a Travel Trailer
1) Clean and Inspect Interior and Exterior
Make sure you clean your RV inside and out before putting it in storage, so you are ready to hit the road in the spring.
Cleaning your RV before storing it for the winter also helps prevent unwanted pests from making a home.
Removing extra clothing and bedding will help avoid moths and removing all food will help keep rodents out.
If you have been in humid climates, keep an eye out for any signs of mold. Even a couple of small white dots of mold can grow into a big problem if left in storage. This is especially true for your refrigerator.
Make sure your fridge is off, empty, defrosted, cleaned, and completely dry before you store your RV.
You can take an extra step and place an open, fresh box of baking soda inside your fridge.
Pro Tip- If you live in a humid climate, consider purchasing a tub of moisture absorber to help prevent any mold.
As you are cleaning, it is a good idea to perform one last inspection for the year.
Get up on your roof and make sure there are no cracks in your seals or weather stripping coming undone.
Examine your slides and awnings to make sure they are clean and undamaged.
If you notice anything that needs to get taken care of, winter is a good time to have your RV in the shop.
RV repair shops have long backlogs, and you would rather have your camper out of commission during the winter than during camping season.
2) Disconnect Batteries and Solar Panels
Batteries (especially lead acid batteries) should not be allowed to drop to 0% charge.
While you might think that turning all of your lights and water pump off will allow your batteries to stay fresh, even a little trickle of static electricity will drain your batteries after a few months.
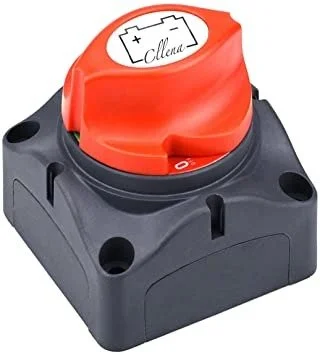
Most RVs have a battery disconnect switch that you twist to shut off power coming from your batteries (like the one pictured above).
If you do not have a disconnect switch, you can simply unhook the cables from your batteries for storage.
If you are storing your RV somewhere where temperatures frequently drop below 0°F, you should consider removing your batteries and storing them inside.
Lithium batteries are low maintenance and can sit for months without any consequences.
Lead acid batteries should be cleaned with baking soda and water to remove corrosion before being stored. As long as your lead acid batteries are in good health, you will not need a trickle charger for a few months of cold weather storage.
Regardless of your battery type, do not try to use or charge your batteries when they are below 30°F.
If you have solar panels on your travel trailer, it is a good idea to disconnect them from your system to avoid any hot wires.
I attached a circuit breaker in our system before the connection to the charge controller so I can just flip a switch and cut any incoming solar power.
Also, make sure to turn off your propane tanks in case a leak develops over the winter.
3) Drain and Clean Waste Water Tanks
The last dump day of the season. It is bittersweet. Go through the motions as you would on any other dump day, but make sure you are thorough. You do not want to return to your travel trailer in a few months to find nasty mold growing in your black tank.
If you have a black tank flush, let it run for a while until the water runs clear through your waste hose.
Our process for a 44 gal black tank deep clean:
Run the black tank flush with the valve open for 5 minutes
Run the black tack flush with the valve closed for 5 minutes (~1 minute for every 9 gallons of black capacity)
Open the black tank flush and run water through it for 5 minutes one last time
Sticking a hose down your toilet is an alternative if you don’t have a black tank flush. While the toilet method doesn’t work quite as well, you can still help break up anything that is stuck down there.
We also know others who dump a bag of ice down the toilet and drive around a bit so it can slosh and loosen anything attached to the walls. Gross visual, but it works.
4) Drain Fresh Water Tank and Water Lines
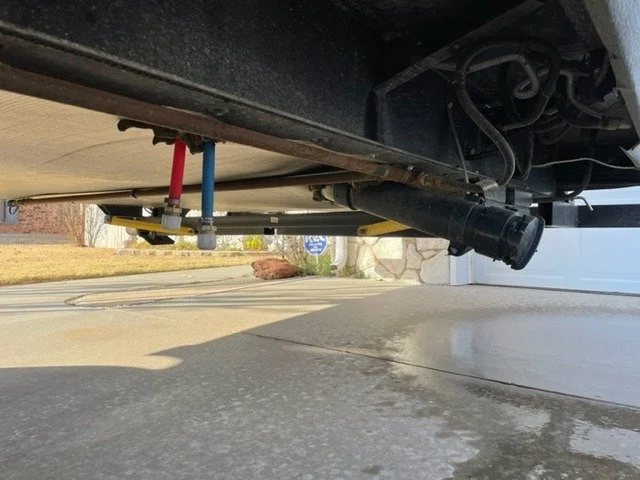
Most RVs now come equipped with low point valves. Look underneath your rig, and you should see three water lines coming down.
Normally, two of these are together (hot and cold water lines), and one is separate (fresh water tank). Don’t worry if you can’t tell which one is which because we will be draining all three lines.
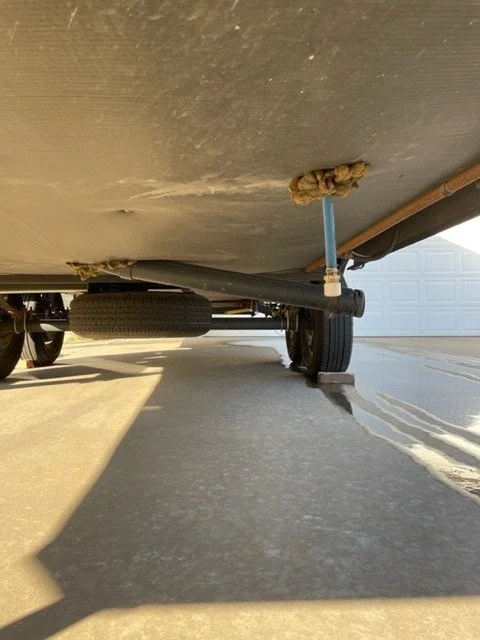
Before we open the valves, turn your water pump off and open all of the faucets. This releases the pressure in the lines and allows them to flow out easier.
If you have a bucket handy and don’t want water going everywhere, place a bucket underneath the first low point valve and unscrew the cap.
Keep in mind that your fresh tank may have more water than your bucket can handle, so check your tank level and plan accordingly.
5) Drain Water Heater
Once your water tank and lines are empty, it is time to move on to the water heater. You should be able to access your water heater by opening a panel outside. There will be a large bolt somewhere behind that access panel.
Ours is a plastic bolt on the bottom left. Put your bucket underneath this bolt and unscrew it.
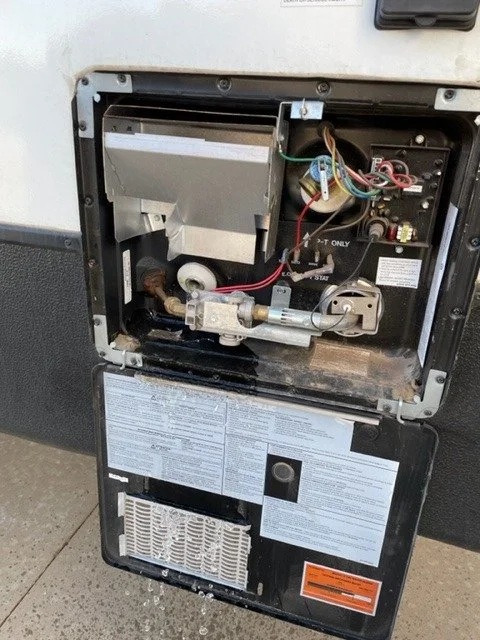
Most RVs have the anode rod attached to this bolt, making winterizing the perfect time for an inspection.
If your anode rod is worn down (usually takes 6 months to a year), pick up a new rod on Amazon.
After the water stops coming out, replace the bolt and close the access panel.
6) Prevent Pipes from Freezing
There are two methods for preventing your pipes from freezing.
Option #1 blows all of the water out of your system, while Option #2 pumps RV antifreeze into your pipes to replace the water.
Both methods will work, so choose the one that is easiest for you. The only significant cost difference between the two arises with the air compressor.
If you already have an air compressor (which we think is a crucial piece of equipment for any RVer) Option #1 will be the quickest and easiest.
If you don’t have a compressor and don’t want to purchase one, you can use Option #2.
*Disclaimer: Please read your specific RV manual to make sure you are following the recommended steps for your exact RV and take note of any special uses.
Option #1: Blow Out Water Lines
Pros:
You won’t have to put antifreeze through your drinking water lines
You won’t have to buy as much antifreeze
Cons:
You need an air compressor which could make this the more expensive option if you don’t already have one
Option #1 Supplies:
- Air Compressor
- Adaptor for Air Compressor
- 1 Gallon of RV Antifreeze
Option #1 Steps:
Attach the air compressor to your city water hookup using the recommended adaptor.
Adjust the air compressor to a max of 30 psi to avoid damaging the water lines.
Open all your faucets, including the outdoor shower and sink, then turn on the air compressor.
A little bit of water should flow out from each faucet leaving your pipes dry and protected from the freezing temperature.
For the toilet, someone will need to hold the flush on the toilet down while the air compressor blows out any remaining water from the line.
After your lines are clear, add about 4 cups of the RV antifreeze down each drain, including the toilet bowl. This will prevent your drain valves and seals from freezing.
Option # 2: Pump in Antifreeze
Pros:
You don’t need an air compressor
You can be sure there isn’t any water residue left behind
Cons:
You need to pump antifreeze into your drinking water lines
You need to buy 4 gallons of antifreeze vs 1 gallon for Method #1
Option #2 Supplies:
- RV Antifreeze Hand Pump Kit
- 4 Gallons of RV Antifreeze
Option #2 isn’t quite as quick and easy, but it works well if you don’t have an air compressor.
This process is much quicker if you have an extra person to open and close the faucets inside while the other person pumps.
Some RVs actually come with a built-in water pump bypass valve to automatically distribute RV antifreeze automatically throughout the system. You can find out if your trailer does by reading your specific RV manual.
Options 2 Steps:

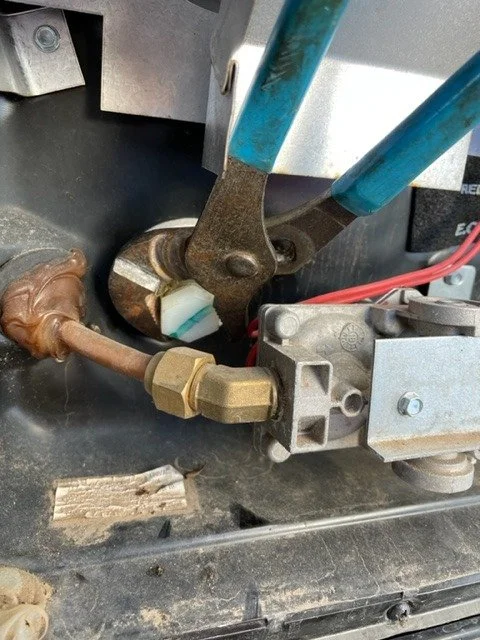
where to turn off bypass valves on hot water heater
Make sure to bypass your hot water heater and water filtration unit (if your RV has one), as you don’t want antifreeze ending up in there.
I’ve included an image to show you exactly where our bypass valves are on our hot water heater.Attach your hand pump to your city water hookup with the other end of the hose in the RV antifreeze.
Close all faucets and drain valves.
Open one faucet at a time, starting with the hot side and keep pumping until you see the bright pink antifreeze coming through the faucet.
Next, close the hot side and open the cold side and repeat.
Repeat step 4 for all of the faucets in your RV. Don't forget to also repeat steps for the shower, outside faucets, and toilet. For the toilet, someone will hold the flush on the toilet down while the other person pumps in the antifreeze.
After your lines are clear, add about 4 cups of the RV antifreeze down each drain, including the toilet bowl. This will prevent your drain valves and seals from freezing.
*Keep in mind that this method adds antifreeze to your drinking water lines. When it is time to get out the RV again to travel you will want to thoroughly rinse water through the lines before using them.
If you don’t want to do this, you should consider buying an air compressor and going with option #1.
7) Store Your Camper Properly
Now that your RV is ready for hibernation, make sure you have a safe place to store it. Snow and ice can cause a lot of issues for rubber roofs and seals.
I recommend storing your camper in a covered spot, even just a covered roof, to protect it from the elements.
If covered storage is not an option for you and you are expecting a lot of ice and snow, consider buying a travel trailer cover. Having a cover will at least give your RV one layer of protection from the winter weather.
Tips for storing your camper outdoors:
make sure your RV is slightly off-level front to back and/or side to side to allow water/ice/snow to flow off the sides
Don’t put your stabilizers down as they create a ramp for rodents to enter
If your storage spot is on grass, put wooden planks under the wheels and leveling jacks so your RV doesn’t sink into the mud when the snow melts.
Use tire covers and a tongue jack cover for trailers
Read next —